Showing posts with label shape. Show all posts

Sunday, November 24, 2013

Kinder Turkeys: Red + Yellow = Mixing Secondary Colors!

To combine a seasonal theme with skill building, I came up with these turkey paintings. Rather than have the kinders stamp their hands into paint and make a hand print, I decided that they could trace their hands with pencils, then mix colors RED and YELLOW to make the secondary color ORANGE and paint in their shape. 

open hand turkey

closed hand turkey with red snood


At circle we read Run, Turkey, Run! (it worked fine, but I think I'd like another book if I do this lesson again... something that doesn't make me feel bad about eating turkeys). 

Next, I modeled how to write a message, my name, and the date in marker along the border. 
Then, how to trace my hand - open and closed feathers were their choice. I also showed how to draw stick legs, triangle nose, and snood. (Snoods can be painted in red paint with one stroke!)
Lastly, how to use the color wheel palettes to mix the two colors. 
After showing them how they'd clean up their palette and brush, I sent them to seats. 

Materials I put out at tables:
-pre-cut and glued green and orange paper (6x6" green on 9x9" orange paper - cut from 12x18" pieces)
-markers to write a message/date/name in the border
-pencil for the hand trace

When students finished tracing their hands, I then handed them 
-a laminated color wheel "palette" that had red and yellow tempera paint on it.* 
-a brush 
-paper towel  (No need for water cups!!)


After students were finished painting, they practiced cleaning off the laminated color wheel with a sponge in the sink, putting it on the drying rack, cleaning their paint brush and leaving it hair up in the cup to dry. 


Here you can see the laminated color wheel palette! 

I have them leave their paintings at their table OR put them on their name-tagged carpet square at circle. Then they could choose free-draw with markers or free-dough, which is just a ball of Crayola play-dough on a tray that I have available. 

*FUNNY STORY.... so after I cut and glued 40 of these paper squares and set up the palettes for the first class, I then tried my sample. And that's when I realized that yellow paint doesn't show up on green paper very well. And that the green paper also made the orange looked like brown. Ha. My jaw dropped and I yelled at myself "This is why you try it yourself FIRST!" But luckily, not too big of a deal! Turkeys are brown after all! It almost looked like I planned it on purpose! What I did to make the tempera yellow pop a little more was to drop a little acrylic yellow paint into it. I was lucky this time! 

Happy Thanksgiving!

Thursday, October 31, 2013

SPACE: Positive and Negative

This inspiration for the Positive and Negative Space lesson came from Dick Blick.
I'd seen the results before, but I wasn't sure how to do it, until I found this link. The effect makes it look  more complicated than it really is.

I did this lesson with 1st grade through 8th grade because I wanted to emphasize the point about utilizing negative space. I wasn't sure that the younger grades could do it, but I was wrong-- they were awesome! (I recommend straighter lines, simplistic shapes. Loops and swirls are complicated and frustrating.) But even some of the older grades found it challenging. I encouraged middle school to make at least 7 cuts, but some just perfected 3-4 for the whole class.

I talked about complementary colors, but I let students choose their color combinations.

Here are some examples:

We did this the week of Halloween, so we went though a lot of black and orange paper. (1st Grade)

3rd grader wanted to add her third color. 

1st grader moved his half sheet to the center and cut both edges, drawn with a stencil. 

1st grader, copied from a middle schooler's work.

2nd grader: "I drew a sword, but I didn't want it to be violent, so now it's a bottle opener." <3

3rd grader drew in shapes on her +/- areas

This 3rd grader went on to make a total of FIVE of these in a 55 minute class. 

1st grader made a book. 

1st grader (added googly eyes on his heart)

6th grade

6th grade

My white board with a goal of 8 cuts for Middle School. 

Friday, October 18, 2013

Geometric and Organic Shape Collages

Dots make lines. 
When lines intersect, they make shapes!

This week we read The Shape of my Heart  by Mark Sperring, which is about seeing the shapes in the neighborhood around us. Abstract shapes like square and circle, as well as recognizable organic shapes like eye shape and hand shape. 

Because we live in New England and the trees are changing color, I chose to make my example drawing the shape of a tree. 

I showed how to cut geometric shapes with scissors --even drawing them first by hand or with stencil-- as well as tearing the paper for soft organic shapes. 

Then I introduced the glue sponge! And showed how to press into the sponge like a stamp, then stick it on the paper. 

We had many other trees designed, and even had a few squirrels hiding in the folded leaves. 
Overall, success!!


   3rd grader who cut out a leopard and made fringe with paint sample cards. 

Wednesday, March 20, 2013

Ukranian Eggs: Pysaty Folk Design

More lines, colors, shapes, and patterns!

This Easter-timed, but culturally-focused work follows our discussion about story-telling in art.

Each color and pattern on a Ukranian egg represents a story. The word pysaty itself means "to write" with beeswax.

I found this fabulous, old-school Reading Rainbow featuring Patricia Polacco dying pysaty after they read her book, Rechenka's Eggs.

I did this lesson with Kinderhaus first, then tried it with older grades. I wasn't planning on doing it with Middle School, but when they saw the eggs they wanted to, too. A few middle school girls are even planned an egg hunt for the Kindergarteners using the eggs they designed.

I have found that although the watercolor crayon-resist method would make the most sense in this lesson, students have more control of their designs when they just use marker.

Of course another egg-stention of this lesson would be to try to actually dye the eggs in the traditional method, but I wasn't ready for that this year. We'll see about next year.

At the bottom of this post, I copied the symbols and color meanings of the designs from http://graphicoriginals.com/history.html.


Symbols    drawings of symbols (will open in a new window)
Sun, circles- life, warmth and the love of God
Swastika- a common motif for happiness, blessings, good fortune and good will.
Tripod- a solar symbol known from Trypillian times meaning a trinity: birth, life, death; man, woman, child; the magical number 3
Star or rose-usually 8 pointed but also 6 and 5 pointed in ancient times signifying purity, life, the giver of light, the center of all knowledge, beauty, elegance and perfection; the eye or divine will of God, symbol of God's love for man. Today sun and cosmic symbols signify happiness, prosperity and good fortune
Triangles-a trinity; formerly air, fire, water or the heavens, earth and air. Now the Holy Trinity is meant.
Lines-unbroken to not break the thread of life
Sieve-dividing good from evil
Basket-contained knowledge, motherhood, the giver of life and gifts
Rakes-rays from the sun, reference to harvest
Spirals-divinity or immortality
Grape vine-continuity, good fellowship and strong, loyal love; as the wine of communion-the love of God and of Christ for mankind
Deer- leadership, masculinity and victory
Horse- an ancient sign for the sun, believed in ancient times to pull the sun across the sky; therefore, wealth, properity, speed and endurance
Ram- perseverence, dignity, leadership and strength
Rooster- coming good fortune, for men it predicts a rich married life with many children
Hen- fertility
Spider-patience, artistry and industry
Hen's feet-protection of the earth toward her young; guidance of the young in their search for knowledge
Horns-nobility, wisdom and triumph over problems; an implication of manhood and leadership
Wolves' teeth-loyalty, wisdom and a firm grip
Churches-appeared at the time of Christianity, used only in western Ukraine
Birds- precursors of spring
Fish- symbol for Christ and Christians
Netting- separating good from evil
Crosses-in many shapes, usually to represent Christ's suffering
Meander lines- eternal life
Ladders- prayer and rising to Heaven
Wheat- generous harvest
Pine needles- eternal life
Dots- stars and constellations
Flowers- wisdom, elegance and beauty
Leaves and flowers- life and growth

Colors
White-purity, virginity, innocence and birth
Green-renewal, spring, hope, health and victory of life over death, freedom from bondage
Yellow-light and purity, harvest, warmth, wisdom, youth
Orange-endurance, strength, ambition, the everlasting sun, the red of passion tempered by the yellow of wisdom
Red-a positive color for passion, action, fire, spiritual awakening, divine love, used especially for children and youth
Black- constancy, eternity, used with white as respect for departed souls, also fear or ignorance
Purple- fasting, faith, patience and trust
Brown- mother earth, bringing forth bountiful gifts
Blue- blue skies, life-giving air, is a talisman of good health
Pink- success, contentment
4 or more colors- family happiness, peace and love

Saturday, November 3, 2012

Monochromatic Robots

I needed a way to name my art room tables, plan seating charts, and introduce my students to the new order in the room. (We gave it a few weeks to see if they needed to have a seating chart, and yeah, the upper elementary grades did.)

Each table was named a color of the ROYGBIV rainbow, plus a "neutral" table because I have 8 tables.

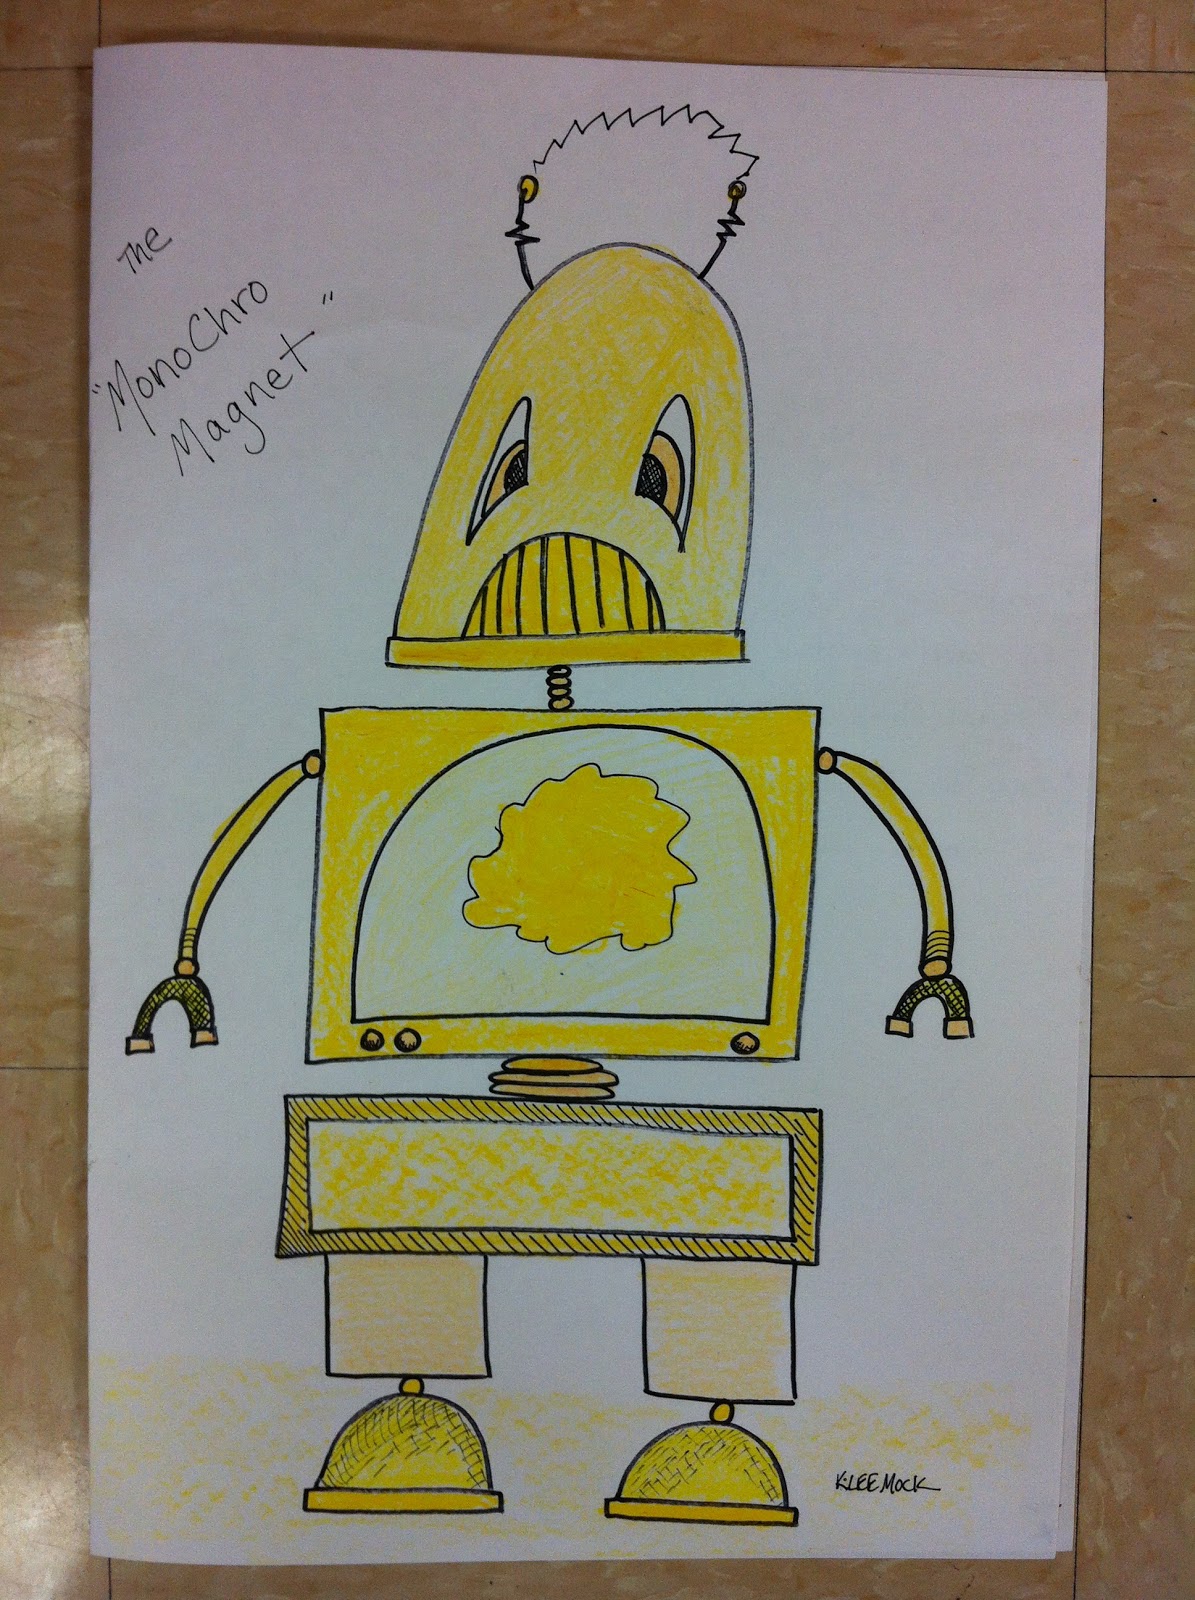
This table naming lent itself well to our next lesson: MONOCHROMATIC ROBOTS!

I am currently enrolled in Deep Space Sparkle's Teaching Art 101 ecourse to give me a little tune up on project ideas. Drawing robots was one of Patty's ideas, and I tweaked it to fit my needs.

MATERIALS:
Shapies - fat and thin
Crayons - I had mine already sorted into separate baskets of ROYGBIV colors.
White paper - I think my paper was about 12x20"

VOCAB WORDS:
LINE
SHAPE
MONOCHROMATIC
TINT
SHADE
CROSS HATCHING (for upper el)

QUESTIONS
Does your robot have a job?
Does it have a name?
Did you repeat shapes?

When these were finished I hung them up in the hallway in ROYGBIV order and they looked fabulous. And THEN the kids really started having ah-ha moments about what monochromatic really meant.


2nd Grade Robot

My example

2nd grade
Orange Monochromatic Robots -- with many shades and tints of orange in the basket


2nd Grade-- Kids clothing often times matches their work!

ROYGBIV hallway! I kept repeating the pattern on both sides of the walls. 


A little video interviewing a 3rd grade student about her Robot Book. (Not sure why the image is flipped...) 


Cezanne's Still Lifes

Last week, we talked about SHAPES when we designed our Monochromatic Robots. Since that was working from imagination, I wanted to teach working from observation, especially because I have some pumpkins and gourds!

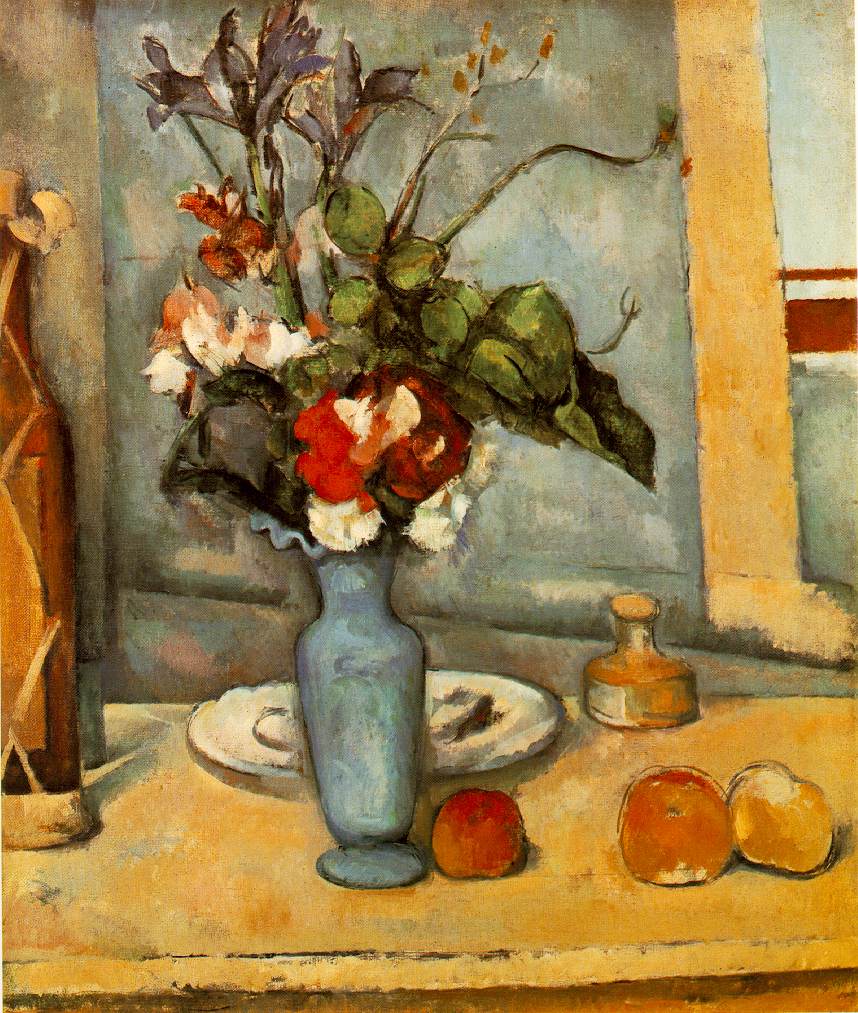
I chose to look at Cezanne's still life paintings, because he believed in simple shapes (circle, triangle, square, rectangle). The word I added this week was OVERLAP. I wrote the following words on big tag cards, which I will add to our Word Wall.

Still Life
Cezanne
Shapes
Overlap 

Cezanne loved SHAPES. And sometimes, he OVERLAPPED his shapes. Where did he overlap his shapes? 

I cut a variety of smallish pieces of colored construction paper and told the students to create at least 3 compositions, and to try different sized paper. Small is less threatening, and kind of cute. (Some only made one if they were focused and worked large, but I said three for those kids that do a quick job just so they can free draw after the assignment.)

I put out chalk and oil pastel, knowing that my containers would get eventually get mixed (Virgo shudder), but I wanted them to try both materials and work them together. For the kids that truly hate the feeling of chalk, I let them use colored pencils, and they came out with some cool results, too. Either way our goal was TO COVER THE WHOLE PAPER WITH COLOR.

Oh, by the way, I did this with all of my students this week: Kindergarten through grade 8. For Upper Elementary and Middle School I also used the word CROP and we talked about zooming in to the still life and thinking about our edges of the paper.

I always find myself talking about the Venn of drawing from imagination or observation, and how artists can fall in that center hybrid of drawing from observation but making choices about how they are editing. In the images below you'll definitely see where some students let their imagination take over and just used the still life as inspiration... to some students who really took on the task of drawing as realistically as possible, to some who just broke down shapes and color in their composition. Man, I love art.

Here are some images from class:

Put your drawings on a carpet square as you finish them:
               

3rd grade:

4th grade:

7th grade:


7th grade: (with this one with talked about crisp edges vs atmosphere, and how he liked the Impressionists. He was really proud of it and shared his process with the class, which, no joke, the whole class sincerely applauded him when he talked about persevering on it.)


1st grade:

4th grade:

3rd grade: